Discover how adhesive baseball cap wall hooks transform cluttered closets into organized displays. Learn installation tips, surface compatibility, and whether this no-drill organizer suits your space. Shop smart at Grandado SE.
If you've ever opened your closet only to find a tangled mess of baseball caps crushed together on a shelf, you're not alone. Baseball cap collections have a way of multiplying—one moment you have a couple of favorites, and the next you're wondering where they all came from. The problem is that traditional storage methods destroy everything you love about your caps: their shape, their color vibrancy, and their accessibility.
The good news? A storage revolution has been quietly taking place in home organization. Adhesive baseball cap wall hooks offer a solution that doesn't require a drill, doesn't demand permanent wall damage, and costs less than a coffee and lunch combo. Whether you're renting an apartment, living in a dorm, or simply unwilling to put holes in your walls, these hooks deliver practical, affordable cap storage that actually works.
This guide covers everything you need to know about adhesive baseball cap organizers—from how the adhesive technology works to installation best practices, surface preparation tips, and real-world applications. You'll discover why renters love these hooks, what makes them different from traditional drilling solutions, and whether they're the right fit for your specific situation.
Check out adhesive baseball cap wall hooks on Grandado SE today.
Why Adhesive Baseball Cap Hooks Are Perfect for Renters and Apartment Dwellers
Renters face a fundamental tension with home storage: you want to organize your space effectively, but you can't sacrifice your security deposit in the process. Adhesive baseball cap hooks solve this problem entirely.
The no-drill installation eliminates damage to rental walls and the anxiety that comes with security deposit inspections. When you move—and most renters do move regularly—you simply peel off the hooks and take your organizational system with you. No patching needed, no explanations required, no deductions from your deposit.
The adhesive is temporary yet remarkably durable. It holds securely without requiring landlord permission or notifying management. You maintain complete control over your space while respecting lease agreements that prohibit wall modifications. This independence matters, especially for those living under strict rental restrictions.
Move-in day becomes infinitely simpler. Rather than waiting for maintenance to install shelving or hanging systems, you can organize your caps immediately. Your space feels personalized and functional from day one, which makes a rental apartment feel more like a home.
How Adhesive Backing Works: Materials and Adhesive Technology Explained
Understanding the mechanics of adhesive hooks helps you use them effectively and maximize their lifespan. These products typically use 3M adhesive technology, which provides industrial-strength holding power specifically engineered for lightweight items like baseball caps.
The structural components—usually ABS plastic or stainless steel—ensure the hooks themselves remain durable over months or years of use. However, the adhesive itself is the critical component. Rather than relying on mechanical fastening like screws or nails, adhesive backing bonds to clean, dry surfaces through molecular adhesion. The adhesive molecules interact with the surface material, creating a hold that strengthens over the first 24-48 hours.
This molecular bonding process depends entirely on surface preparation. Dust, residue, oils, and moisture prevent proper adhesion. A properly cleaned surface—one that's been wiped down with rubbing alcohol and allowed to dry completely—creates the optimal conditions for adhesive contact. The difference between a surface that's simply wiped and one that's properly prepared can be the difference between hooks that hold for years and hooks that fail within months.
Best Surfaces for Installing Your Cap Organizer Without Damage
Not all surfaces accept adhesive equally. Understanding which surfaces work best helps you plan your installation strategy and avoid frustration.
Smooth drywall provides the ideal surface for adhesive hooks. The uniformity of standard drywall allows the adhesive to make full contact, resulting in the strongest long-term hold. If your walls are painted, painted drywall works equally well—provided the paint is properly sealed and not peeling or flaking.
Closet interiors deserve special attention because they offer protected environments where adhesive maintains peak performance. Inside closets, you avoid humidity fluctuations, direct sunlight, and temperature extremes. This stable environment is why closet installations often outlast wall installations by significant margins.
Wooden doors and door frames accept adhesive hooks effectively, particularly if the wood has been properly finished or painted. A quick cleaning with rubbing alcohol ensures optimal adhesion.
Avoid textured surfaces, unfinished wood, and areas prone to moisture. Textured wallpaper, popcorn ceilings, and heavily textured paint finishes prevent the adhesive from making consistent contact across the hook's backing surface, resulting in weak or failed installation.
Installation Guide: From Unboxing to Your First Cap Display
Installing adhesive baseball cap hooks correctly determines whether they'll hold securely for years or fail within weeks. This process is straightforward, but precision matters.
Start with surface preparation. Clean your target surface thoroughly with rubbing alcohol to remove dust, residue, and any oils. Use a lint-free cloth and take your time—this step directly impacts adhesive performance. Pay special attention to areas where you'll place the adhesive backing.
Allow complete drying. After cleaning, wait 5-10 minutes minimum before applying the hooks. Any residual moisture compromises adhesion. In humid environments, extend this drying time to ensure the surface is completely dry.
Apply the adhesive backing carefully. Peel back the adhesive backing slowly, then position the hook precisely on your prepared surface. Press firmly for a full 30 seconds. This pressure ensures the adhesive makes complete contact with the surface and bonds effectively.
Observe the curing period. This is where many installations fail. Wait 24-48 hours before hanging your first caps, even if the hooks feel secure immediately. The adhesive needs time to cure and reach full strength. Hanging caps too early can cause premature failure.
Plan your spacing thoughtfully. When installing multiple hooks, space them appropriately to prevent caps from touching and becoming misshapen. Cramming hooks together defeats the purpose of proper cap storage.
Organizing Your Baseball Cap Collection: Display Strategies and Arrangement Ideas
Once your hooks are installed and cured, the organizational possibilities become clear. Beyond simply hanging caps, you can create a display that reflects your personal style and collection.
Arranging caps by color creates a cohesive, gallery-like aesthetic that complements your décor. If you own a rainbow of caps, this approach turns your collection into a visual design element rather than just storage. The effect can be surprisingly striking.
Alternatively, group caps by team, brand, or sentimental value. This organization system creates meaning—you can see at a glance which teams you support, which brands you prefer, and which caps hold special memories.
Display your favorite or most-worn caps at eye level for easy access and visibility. Reserve lower or less prominent hooks for caps you wear less frequently. This arrangement optimizes both functionality and display value.
Consider creating a capsule cap collection. Instead of trying to display every cap you own, curate your favorites and store extras elsewhere. This approach reduces clutter and ensures your displayed caps are genuinely loved and worn regularly.
Find your perfect adhesive cap organizer setup on Grandado SE.
Comparing Adhesive Hooks to Traditional Drilling Solutions
Understanding how adhesive hooks stack up against traditional drilling approaches helps you make an informed decision about which solution suits your situation.
Adhesive hooks eliminate the need for power tools entirely. You don't need a drill, wall anchors, screws, or expertise in home improvement. The installation process is accessible to literally everyone, regardless of DIY experience or comfort level with tools.
Drilling requires power tools, hardware, expertise, and often multiple trips to the hardware store. Even simple drilling projects can intimidate those without experience. For renters, drilling creates an additional complication: you typically need permission, and you're damaging property you don't own.
Adhesive solutions are completely reversible. If you change your mind, move, or want to reorganize, you simply remove the hooks. Drilling creates permanent holes that require patching, spackle, and repainting—expenses and effort that adhesive solutions avoid entirely.
Cost comparison tells a compelling story. Adhesive hooks cost approximately £10.59. Drilling hardware, wall anchors, and screws might cost £5-10, but add professional installation if you're not comfortable doing it yourself, and you're looking at £100+ for a simple project. For renters especially, the adhesive solution's reversibility makes even the slightly higher material cost worthwhile.
Adhesive Limitations and When These Hooks Might Fall Short
Adhesive baseball cap hooks are genuinely transformative for the right application, but they're not perfect in every situation. Recognizing their limitations helps you determine whether they're right for you.
Heavy baseball cap collections exceeding 10-15 caps may require multiple units. Each individual hook holds one or two caps effectively. A massive collection might necessitate hybrid solutions—combining adhesive hooks with additional shelf storage or a traditional hat rack.
Humid environments like bathrooms and kitchens can reduce adhesive effectiveness over time. The moisture in these spaces can gradually soften the adhesive, particularly over months or years. Closet installations—which remain relatively dry—typically outperform bathroom installations.
Extreme temperature fluctuations compromise adhesive grip. Unheated garages, attics, or storage areas where temperatures swing wildly between seasons can degrade adhesive performance. Standard living spaces with consistent temperatures work much better.
Textured or uneven surfaces prevent proper adhesive contact. If your walls are heavily textured, poorly finished, or uneven, adhesive hooks simply won't work effectively. A test installation on a small area can help you determine whether your specific surface is suitable.
Removing Adhesive Hooks Safely: Protecting Your Walls and Deposit
Eventually, you may want to remove your adhesive hooks—whether you're moving, reorganizing, or shifting to a different storage solution. Removing them safely protects your walls and your security deposit.
Apply gentle downward pressure while slowly peeling back the hook. Rushing the removal process can damage the wall surface. A slow, steady peel removes the hook cleanly and minimizes residue.
If the hook resists removal, heat from a hair dryer softens the adhesive, making removal easier and cleaner. Warm the adhesive backing for 30 seconds, then slowly peel the hook away. This technique prevents damage to delicate wall finishes.
If adhesive residue remains after removal, rubbing alcohol applied to the sticky spots helps dissolve what's left. Gently rub with a cloth until the residue transfers to the cloth. This step removes the final evidence of installation.
Document your wall condition before installation with photos. These images protect you during security deposit inspections by proving the walls were in good condition before you installed the hooks. If your landlord questions deposit deductions, you have visual evidence that installation and removal caused no damage.
Choosing the Right Adhesive Cap Organizer: What to Look For
Not all adhesive baseball cap hooks are created equal. Evaluating products based on specific criteria helps you select one that will perform reliably.
Verify the adhesive type. Premium products specifically mention 3M brand adhesive, which indicates industrial-strength reliability. Generic adhesive or unspecified adhesive quality is a red flag.
Check weight capacity specifications. Caps are relatively lightweight, but poorly designed hooks might have surprisingly low weight limits. Verify that the hooks can support your intended use without strain.
Read reviews specifically about adhesive longevity and performance on your wall type. General reviews are helpful, but reviews from users with similar walls and environments are most valuable. Someone's positive experience on drywall matters more if you also have drywall.
Compare hook materials. Stainless steel outlasts plastic in humid environments. If you're installing in a bathroom or other moist area, stainless steel is worth the potential premium.
Real-World Applications: Where Adhesive Cap Hooks Shine
Adhesive baseball cap hooks excel in specific environments and situations. Recognizing these ideal applications helps you visualize how they'd work in your own space.
Dorm rooms represent the classic use case. Drilling is prohibited, space is limited, and temporary solutions are essential. Adhesive hooks transform dorm organization while respecting facility rules and ensuring you're not violating your housing agreement.
Apartment entryways become more functional and personalized. Displaying your favorite caps near the door keeps them accessible while adding personality to your entry space. Visitors see a thoughtful display rather than a storage problem.
Home office walls benefit from cap hooks as a design element. Your cap collection personalizes your workspace while staying organized and accessible. This application turns functional storage into décor.
Closet doors maximize vertical space and improve morning routine efficiency. Rather than searching through a pile of caps, you see your collection at a glance and grab what you want to wear.
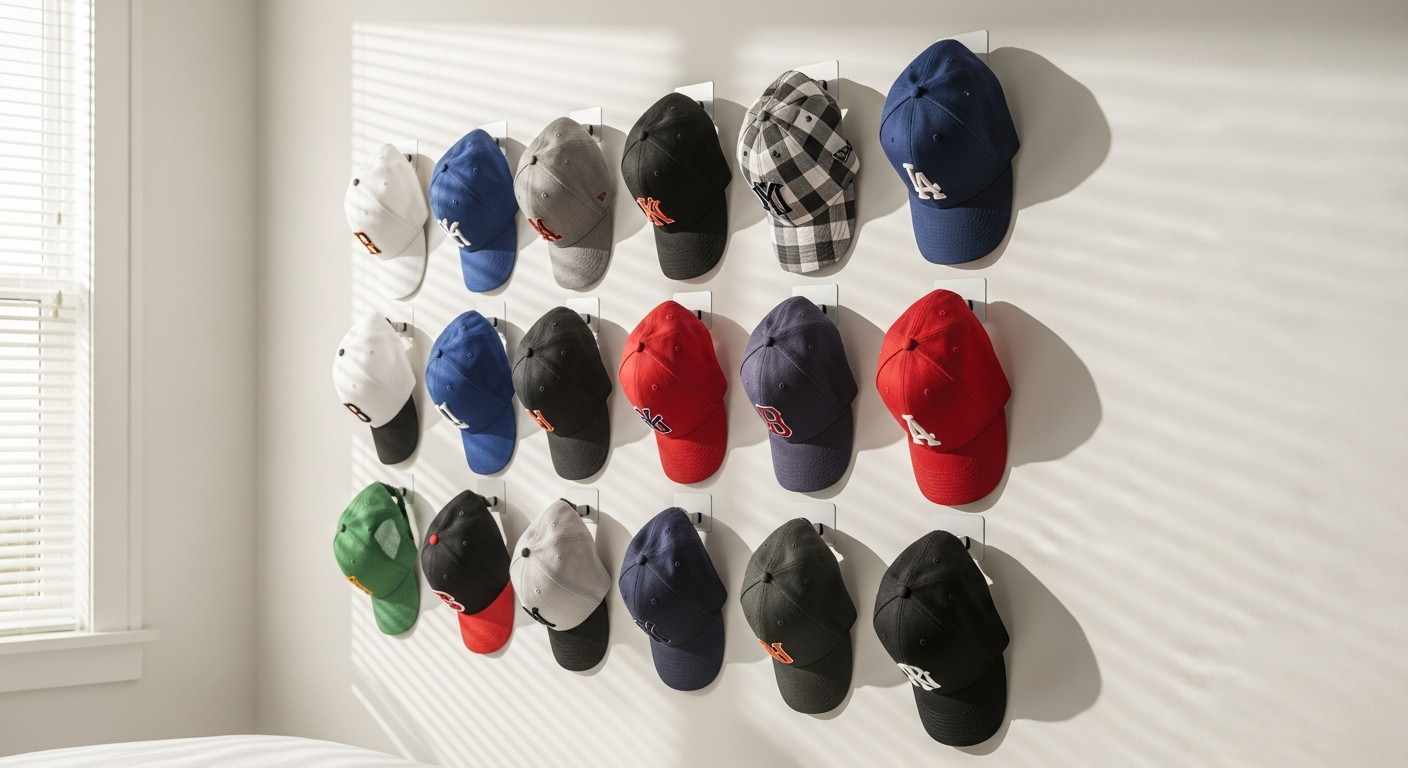
Bedroom walls reflect your personal style and interests. Your cap collection becomes a visual expression of who you are, organized in a way that's both functional and aesthetically satisfying.
The Bottom Line on Adhesive Baseball Cap Wall Hooks
Adhesive baseball cap wall hooks organizers deliver exactly what they promise: simple, affordable, damage-free storage for your favorite caps. They're transformative for renters, apartment dwellers, and anyone hesitant about permanent wall modifications. The installation is straightforward, the results are immediately satisfying, and the price point makes this an accessible organizational upgrade for virtually any budget.
That said, they're not a universal solution. If you're managing a massive collection or dealing with particularly humid environments, you might need to supplement with additional storage or explore hybrid approaches. The real magic happens when you match the right product to your specific situation.
For renters, frequent movers, and anyone who values flexibility over permanence, adhesive baseball cap hooks are genuinely worth the investment. Your caps deserve better than being crushed in a closet pile, and your walls deserve to remain unmarked.
Transform your cap collection from chaos to display with adhesive hooks from Grandado SE.